Pages

Wednesday, December 23, 2015

The Best White Bread

I almost always make my own bread.  I have a wheat grinder and typically make whole wheat bread.  Last week I was visiting Valerie out in California and when I arrived, she had a fresh loaf of this bread on her counter.  It was heavenly.  When I got back from California, I decided to make breads for work gifts.  After church on Sunday and made 18 loaves of different kinds of breads!  It was pretty fun, but also rather exhausting.  This one was one of the breads in the mix and it was a winner.  I won't be abandoning my whole wheat bread recipe anytime soon, but when I want a treat, this hits the spot.


2/3 cup white sugar
2 cups warm water
5 teaspoons yeast
6 cups unbleached all purpose flour
2 tablespoons vital wheat gluten
2 teaspoons salt
1/2 cup oil

In a stand mixer, add sugar and warm water.  sprinkle yeast on top and let it sit 5 minutes until it gets foamy.  Add flour, salt, and oil.  Turn on mixer and knead for 7 minutes.

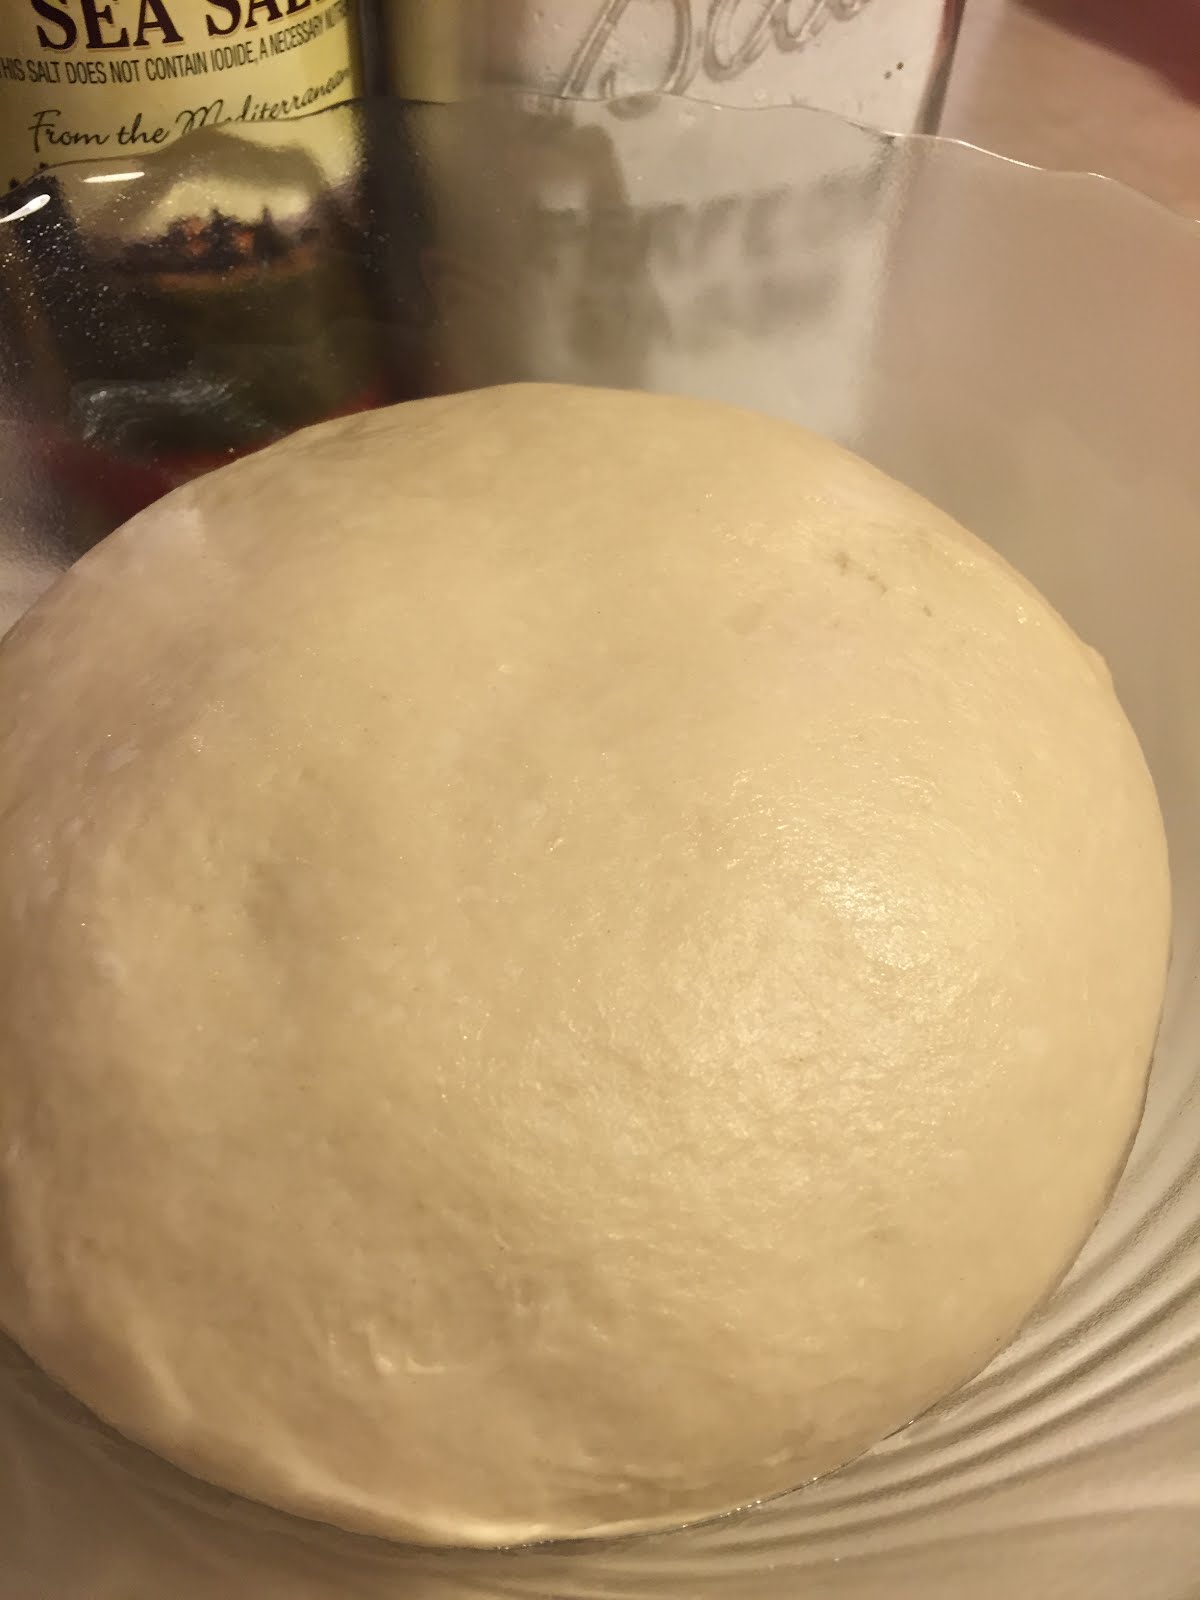
Place in a large, clean, greased bowl to rise and cover lightly with greased plastic wrap or a dish towel.  Let it rise until it has doubled in size.  If you poke the dough and it doesn't spring back, you will know it is ready.  Punch the dough down and knead it a couple of times.

With buttered hands, shape into two loaves and place in greased bread pans.  Let it rise again until it has risen to the top of the loaf pan.

Bake at 350 for 30 minutes.  Remove promptly from pans and let it cool on a baking rack or clean dish towel.

Enjoy!

Tips:

Flour:  Flour should never be an exact measurement when making yeast breads.  The look at touch of the dough will tell you how much flour to add more than a measuring cup.  The dough should be very soft.  Add just enough flour that you can still handle the bread, but no more.  If you flour your finger and tap the dough without it sticking, it will be just right.  Another indicator is to watch for when the dough starts pulling away from the sides of the bowl.

Freezing: This dough freezes great.  Unless I am going to give a loaf of bread away, two loaves is way too much.  You can freeze it after the first rise, when you shape the loafs. Place one shaped loaf in a gallon sized freezer bag. When you are ready to use the frozen loaf, place it in a greased loaf pan, cover with lightly greased plastic wrap, and let it thaw overnight in the fridge. In the morning place in on the counter and let finish rising for a few hours.  Bake as normal.

Monday, November 9, 2015

Curried Cauliflower

Lately I've been on the hunt for interesting side dishes. You can only eat steamed broccoli so many times before your ready for a change. Recently I had a head of cauliflower sitting in my fridge that needed to be used. I love steamed cauliflower with butter and salt and pepper, but my husband is not so happy to eat it in that form. So in my search of a way to make it more palatable to him I found this simple recipe on Mel's Kitchen Cafe. I can't claim any credit for it since it was perfect the beginning. But it is so good, I just have to share. My husband declared it an acceptable way to eat cauliflower and I made it again the next day it was so good. I call that a win.

One last quick note. The curry is a really subtle flavor here so even those who don't love curry flavor may be persuaded to eat this. I hardly noticed it was curry flavored.


Curried Cauliflower 
Servings: 4-6

INGREDIENTS
1 medium head cauliflower
1 1/2 tablespoons olive oil
1/4 to 1/2 teaspoon salt
1/2 teaspoon curry powder

DIRECTIONS
1.    Preheat the oven to 475 degrees F.
2.   Wash and core the cauliflower and cut the florets into bite-size pieces. Place in a large bowl.
3.   Toss the cauliflower with the olive oil, salt and curry powder.
4.   Turn out the cauliflower onto a large rimmed baking sheet. Bake for 16-18 minutes, stirring every 6-7 minutes, until the cauliflower is browned in spots and is crisp-tender.
5.    Serve immediately.

From Mel's Kitchen Cafe

Saturday, November 7, 2015

The Best Biscuits Ever

I'm alive! I haven't posted in months and months. Morning sickness got the better of me for a while and then I was just plain busy! But I hope I can post on here regularly again. I've been cooking up a storm lately and have lots of recipes I want to share. The trick is remembering to photograph them. I always forget to take pictures. I'm hoping having a baby will help me remember that I actually want to document life (and maybe that will apply to the food I make too?).

Anyway, today I want to share with you my favorite biscuit recipe ever. I've heard a lot of people say they don't like biscuits. And I have experienced way too many dry, tough biscuits that are not worth eating. But these are a different story. They are flaky and light and delicious. Give these babies a chance and you might just find yourself liking biscuits.


The Best Biscuits
Makes 12 biscuits

Note: They will only turn out light and flaky if you don't overwork the dough. Be careful not to handle it too much. You want little pieces of butter still in the dough even after it has been kneaded. This is what produces the flaky, light texture.

Ingredients:
2 cups all-purpose flour (I've done as much as 3/4 wheat and they are still delicious!)
1 tablespoon sugar
3 teaspoons baking powder
1 teaspoon salt
1/2 cup butter
3/4 cup milk

Directions:

1. Heat the oven to 450°F. In a medium bowl, stir the flour, sugar, baking powder and salt until mixed. Cut in the butter using a pastry blender or fork, until mixture looks like fine crumbs. Stir in the milk until mixture forms a soft dough and leaves the side of the bowl (dough will be soft and sticky).2. Lightly sprinkle  our over a cutting board or countertop. Place dough on floured surface; gently roll in the  our to coat. To knead dough, fold dough toward you. With the heels of your hands, lightly push dough away from you with a short rocking motion. Move dough a quarter turn and repeat 10 times. Dough will feel springy and smooth.3. On the floured surface,  flatten dough evenly, using hands or a rolling pin, until dough is 1/2 inch thick.4. Before cutting each biscuit, dip a 2 1/2-inch round cutter into  our to lightly coat it so it will cut cleanly through the dough without sticking. To cut, push the cutter straight down through the dough without twisting or turning. Cut the biscuits as close together as possible. On an ungreased cookie sheet, place biscuits about 1 inch apart for biscuits with crusty sides, or place with sides touching for biscuits with soft sides.5. Bake 10 to 12 minutes or until golden brown. Immediately remove from cookie sheet. Serve warm. 

Friday, October 16, 2015

Minestrone Soup

Minestrone Soup is probably one of my favorite soups.  Even though it is October, it doesn't fell like fall quite yet.  Yesterday I decided  like I would pretend like it was cool enough to make soup.  I already had all the ingredients on hand, so I got to work chopping all the vegetables.  It turned out to be a perfectly tasty, comforting, and nourishing bowl of soup.


1 lb sausage (I used a sweet chicken sausage)
1 medium onion, chopped
1 1/2 cups carrots, chopped
2 small zucchini chopped
2 cans diced tomatoes
4 cups chicken broth
1 cup small pasta
1 can kidney beans, drained
2 handfuls spinach, roughly chopped
2 teaspoons dried basil
1 teaspoon salt
1/2 teaspoon fresh cracked pepper

1. brown sausage in a frying pan.  When halfway cooked, add onion and carrots and cook until sausage and vegetables are cooked through.

2. In a large pot add sausage and vegetables, tomatoes, and broth.  Add zucchini and pasta.  Cook until pasta is almost cooked through and zucchini is tender.

3. Add kidney beans, spinach, and seasonings.  Simmer for 5-10 minutes.  Serve!

Wednesday, September 30, 2015

Almond Coconut Muesli

We have taken a little hiatus from this blog.  Part of my hiatus was due to a pretty epic trip to Europe and another part has been to cooking, but not measuring ingredients.  The good news is I am back from Europe and actually took the time to measure the ingredients for this recipe.  This was inspired by lovely Italian breakfasts.  Is it just me that finds memories and food closely intertwined?  My first morning in Italy we woke up at a charming hotel and there was a wonderful breakfast.  Among the options were plain yogurt, muesli, fruit, and honey.  I had never tried muesli before, but it looked wonderful.  I mixed it with the tangy yogurt, topped it with fruit, and drizzled a little honey on top.  It was wonderful and inspired me to see if I could recreate it back home. I think it comes pretty close.

5 cups old fashioned oats
1 cup shredded coconut
1 cup sliced almonds
1/2 teaspoon cinnamon
3/4 teaspoon salt
3 tablespoons pure maple syrup
2 tablespoons coconut oil, melted
1 teaspoons vanilla
1/2 cup mini dark chocolate chips (optional)

1. Mix oats, coconut, almonds, cinnamon, and salt together in a medium sized bowl.

2. Add maple syrup, coconut oil, and vanilla.

3.  If desired, spread ingredients out on a baking sheet and place in preheated oven for 10-15 minutes until lightly toasted. Once cool, mix in chocolate chips, if desired.

4. Store in an airtight bag or container in the freezer.

Serve with milk or yogurt and top with fruit.

Friday, September 25, 2015

Chocolate Zucchini Cake with Ganache, Berries, and Cream

Last week I was looking for a recipe that would serve a crowd, but would still be Sunday worthy.  I generally think desserts Sundays should be a step up from the ordinary.  Now is the tail end of zucchini is in growing in gardens and cheap in the stores, so it is the perfect time of the year to make this cake.  My sister told me she is generally disappointed in the texture of zucchini cakes, because the end up almost gummy and gelatinous.  (Is that even a word?)  This cake was nothing of the sort.  The cake was moist and the crumb was tender.  I'm pretty sure the combination of tender zucchini cake, ganache, berries, and cream was a match made in heaven.  Fun little fact, the plate below is part of my great grandmother's china set.


Cake:
2 1/2 cups all purpose flour
1/2 cup baking cocoa
2 teaspoons baking soda
1 teaspoon salt
2 eggs
2 cups sugar
1 cup vegetable oil
1/2 cup buttermilk
2 teaspoons vanilla
1/2 cup boiling water
2 cups grated zucchini

1. In a medium sized mixing bowl, whisk together flour, baking cocoa, baking soda, and salt.

2. In an electric mixer, add eggs and lightly beat.  Add sugar and vanilla mix until well combined.  With mixer running, slowly add oil and buttermilk.

3. Add the dry ingredients and mix until just combined.

4. Fold in grated zucchini.  Add hot water and mix until combined.

5. Pour into a greased jelly roll pan.  Bake in a 350 degree oven for 25 minutes.

Ganache:
8 ounces of good quality semi sweet chocolate chips
1/3 cup cream

1. Place chocolate chips in a glass bowl.

2. Heat cream on medium low heat until it is almost boiling.

3. Pour cream over chocolate chips and stir until all the chocolate chips are melted.  If they don't completely melt, microwave for 10 seconds at a time, stirring between each interval.

Cream:
3 cups cream
1 teaspoon vanilla extract
2 tablespoons powdered sugar or pure maple syrup

The cream is good either just drizzled on top of the berries and cake or whipped. 

If you choose to whip it, whip the cream with an electric mixer until soft peaks form.  Add 1 teaspoon vanilla extract and sweetener.  Whip until cream forms stiff peaks.

If you choose to drizzle the cream, just mix in the vanilla and sweetener and serve in a pitcher beside the cake.

Berries:
3-4 cups fresh raspberries or diced strawberries

To assemble the cake, cut the cake into squares, top with berries, and drizzle or dollop cream on top.  Enjoy!


Recipe simplified and adapted from Simply So Good.

Thursday, June 11, 2015

Lemon Rice

More carbs, I know.  I promise we'll get some healthier recipes out there soon.  But for now, enjoy carb overload.  This lemon rice is to die for.  The first time I tasted it, I'm pretty sure my eyes popped.  The lemon was stronger than I expected and in a good way.  I've had a lot of bland "flavored" rice dishes in my day.  This one far exceeded my expectations.  Not under or over doing it with flavor.  It is just perfect in my book.  I'm salivating just thinking about it.  

I always serve this rice with lime chicken, though I'm sure it would be delicious with many other dishes.  It also is delicious as breakfast.  I may or may not be guilty of eating every tasty morsel for breakfast the day after.


Lemon Rice

1/3 cup lemon juice
4 tbs. butter
1 tsp. salt
2 cups brown rice
3 & 3/4 cups chicken broth, hot
black pepper to taste

In a large, wide saucepan bring the lemon juice, butter, and salt to a boil. Add the rice and cook, stirring frequently, until the liquid is absorbed. 


Add the hot chicken broth, cover, and cook on low until the rice is cooked, about 45 minutes.  Remove from heat with lid still on and let rest for 10 minutes to ensure the moisture is all absorbed.  Stir in black pepper and more butter, if desired. 

Recipe from my mother-in-law.

Wednesday, June 10, 2015

Portuguese Sweet Bread

Okay guys, it has been a while.  Can I just say that I was moving to another state and be forgiven for my absence?  Thanks for being patient while I packed up and unpacked all my belongings.  I haven't cooked nearly as much in the past month since we were searching for an apartment, packing, moving and unpacking.  But I am back on my game!  I have gone to the store a million times and feel like I am finally stocked up on my staples.  I may have cringed and pulled my hand back when I saw the prices, but at last I have realized I have left cheap Utah prices behind.  Sigh.  The food may not be cheap in California, but it is a beautiful place to live!  And farmer's markets year round?  Yeah, I'll take that.

This recipe doesn't take anything from the farmer's market, but is absolutely divine.  This lightly sweetened bread is my husband's favorite.  In fact, it was his birthday "cake."  He'd much rather have this than actual cake.  I'm alright with that.  Though not the healthiest bread to down, it certainly is one of the most delicious.  Light and fluffy and delicate lemon flavor combine to make the most addicting bread.  It never lasts long in our house!


Portuguese Sweet Bread

1/3 c. milk
2 tbs. instant mashed potatoes
1/3 c. sugar
1/4 c. butter, cut into chunks
1 tbs. yeast
1/4 c. warm water
2 large eggs
1/2 tsp. salt
zest of one lemon
1/2 tsp. vanilla
2 1/4 - 2 3/4 c. all-purpose flour
2 tbs. melted butter

Heat milk until boiling. Remove from heat and immediately stir in instant mashed potatoes, sugar and butter. Let cool until just warm.

In a stand mixer or bowl, sprinkle yeast over water and let stand for 5 minutes. With the dough hook, mix the beaten eggs, salt, lemon zest, vanilla, potato mixture and flour. Start with 2 cups of flour and mix until combined. Keep adding flour slowly with the mixer going until you have a soft dough. It will no longer be sticky. Be careful not to add too much flour or the dough will become too stiff.

Cover dough with a damp kitchen towel and let rise in a warm place until doubled, about 1 1/2 hours.  If you poke an indentation in the dough and it doesn't spring back, it has risen enough. If you are in a hurry, my sister-in-law taught me a great trick. Warm your oven up just slightly and then turn the oven off. Leave the dough in the oven to rise and it will rise quicker. Just make sure it is mildly warm in the oven. If it is too hot, let it cool down before putting the dough in. We don't want to cook the bread yet!

Knead dough breifly to release air bubbles. Let dough rest 5-10 minutes.

On a lightly oiled surface, roll dough with your fingers into a 30" rope. Coil rope, twisting slightly as you go, into an oiled 9" pie pan, starting in the center and moving out.

If desired, brush with melted butter. Cover loosely with plastic wrap and let rise in a warm place until puffy, about 40 minutes.

Uncover and bake in a pre-heated over at 350 degrees for 25 minutes or until deep golden brown.


Slightly adapted from my mother-in-law.

Tuesday, June 9, 2015

Banana Cream Pie

Often when I think of making pie I think of a long time intensive dessert.  Pies aren't hard to make, but they take longer than whipping up a batch of cookies or a pan of brownies.  I love pie, but don't often have the time to make one.  This pie is almost more "assembly" than "cooking".  The boxed pudding makes this come together in a snap.  I rarely buy boxed mixes, but I think the cook-and-serve pudding is pretty tasty and sometimes you need to take the short cut.

I am pretty particular when it comes to banana cream pie.  I usually don't like store bought ones and although I love bananas, I don't like things with fake banana flavor.  I really prefer vanilla pudding in this pie.  Graham cracker crusts are so tasty, because they have butter!  This one has just a hint of cinnamon, which adds a subtle dimension to the pie, that is fantastic.  If you want to get all fancy, feel free to pipe the whipped cream on, but I just spread it on the top and called it good.


Graham Cracker Crust:
1 1/3 cups crushed graham crackers (I crushed them in the blender)
1/3 cup sugar
6 tablespoons butter, melted
1/2 teaspoon cinnamon

Mix together until well combined.  Press into a 9 inch pie plate along the bottom and up the sides.  Bake at 375 for 7-8 minutes.  

Filling:
1 large box cook and serve vanilla pudding, prepared and cooled
3-4 bananas, sliced
1 cup whipping cream
1 teaspoon vanilla
1 tablespoon powdered sugar

The rest of the pie is mostly assembly.  Whip the cream until thick, add vanilla and sugar and whip until soft peaks form.  Slice 2-3 bananas into the bottom of the crust. Pour pudding on top, then spread whipped cream on top.  Slice and add the last banana on top.  Serve immediately.

Crust recipe adapted from my cousin Emily.

Friday, June 5, 2015

Fried Rice

Fried rice is one of my go to meals when all I have are a few scraggly vegetables left in the fridge.  I pretty much always have rice and eggs on hand and have started picking up ham steaks when the go on sale to keep in my freezer for this very purpose.  You can switch this up with different vegetables and types of rice depending on what you like and have on hand.  This is one of my favorite combinations.  I bet bean sprouts or a bell pepper would be awesome in this.  Once I added some purple cabbage and while it tasted good, it turned the ham and rice purple!  I don't think I will do that again.  One trick is using cold rice, since it isn't quite as sticky, making this is a good meal to use up leftover rice.


4 1/2 cups cooked rice (1 1/2 cups uncooked).  I usually use brown rice, but any kind will work.
2 Tablespoons olive oil
1 1/2 cups chopped ham
3 cloves minced garlic
1 onion, diced
3 carrots, peeled and diced
1 small head broccoli, chopped (I even peel and chop up the stem)
1 zucchini, chopped
1-2 green onions, sliced
2/3 cup frozen peas
2-3 eggs
1 cup fresh
Soy sauce to taste
Fresh cracked pepper

1. Heat oil in a large frying pan.  Add chopped ham and cook, stirring occasionally until ham is lightly brown.

2. Add onion, cook for a couple minutes, then add garlic and carrots and cook for another couple minutes.  Add the rest of the vegetables, except the peas.

3. In a separate small frying pan, scramble the eggs, breaking them into smaller pieces.

4. When vegetables are slightly tender, add rice, eggs, green onions, and peas to large frying pan.  Stir everything together.  Season with soy sauce and pepper and cook until rice is hot.  Enjoy!

Variations: Add 1 cup fresh pineapple, chopped.  Instead of scrambled eggs, top each serving with a soft fried egg.

Friday, May 22, 2015

Cinnamon Roll Cake

Cinnamon rolls are one of my favorite treats, but they take a little more time than I am willing to invest on a regular basis.  I first tried a version of this when I was staying with a friend in Arizona and I thought it was wonderful!  I have made it a few times since then for different events, slightly adapting it each time.  I love that it has normal ingredients that I always have on hand.  The first time I made it, I thought it was way too sweet and had a little too much butter (and I love butter).  I have cut down the sugar and butter a bit and think it is just about perfect.  The cinnamon shines through and it is still plenty sweet.  Every time I make this, it is always well received.


Cake:
3 cup flour
1/4 teaspoon salt
3/4 cup sugar
4 teaspoon baking powder
1 1/2 cups milk
2 eggs
2 teaspoon vanilla
1/2 cup butter, melted

Topping:
14 tablespoons butter, softened
3/4 cup brown sugar, lightly packed
2 tablespoon flour
1 tablespoon cinnamon

Mix everything together except for the butter. Slowly stir in the melted butter and pour into a greased 9×13 pan. For the topping, mix all the ingredients together until well combined. Drop evenly over the batter and swirl with a knife. Bake at 350 for 28-32 minutes.

Glaze:
1 1/2 cups powdered sugar
4 tablespoon milk
1 teaspoon vanilla

While warm drizzle the glaze over the cake.

Adapted from Your Home Based Mom.

Thursday, May 21, 2015

Banana Cake

This is the best banana cake.  It is moist without being too dense.  I have tried several recipes for banana cake and while they are usually good, they aren't anything to write home about.  The first time I made this cake, my friend Kelsey requested that I use this her family's recipe for this banana cake for her birthday.  It is a Howell family classic, with good reason!  The Howells are great cooks, so it was no surprise that this cake was fantastic! I have made it several times since.  The recipe has been slightly adapted (I can't help myself), but no matter how I make it, where ever I bring it, it is a hit!

Ingredients:
3/4 cup butter
2 cups sugar
2 teaspoons vanilla
3 eggs
3 cups flour
1/4 teaspoon salt
1 1/2 teaspoon baking soda
1 1/2 cups mashed banana
2 teaspoon lemon juice
1 1/2 cups buttermilk

1.  Preheat the oven to 300 degrees and grease a 9x13 cake pan.

2. With and electric mixer, cream together butter and sugar until light and fluffy.  Add eggs and vanilla.

3. In a separate bowl, whisk together dry ingredients.  Add dry ingredients to butter mixture.  Mix until partially combined.  There should still be a few dry streaks.

4.  Add lemon juice while mashing bananas and once mashed, add with butter milk to the batter.  Mix until just combined.

5. Pour batter into cake pan and bake at 300 degrees for 1 hour.  Sounds crazy to bake it at such a low temperature, but it works.  You will know it is done, when a toothpick inserted comes out clean.

Frosting

8 ounces cream cheese
1/2 cup butter
2 cups powdered sugar
1 teaspoon vanilla

1. Soften cream cheese and butter.  Beat together until fluffy.  Add vanilla and powdered sugar.  Beat until well combined.  Spread on top of cooled cake.

Friday, May 15, 2015

Lettuce Wraps with Peanut Sauce

My husband and I are in the midst of moving so posting is a bit spotty right now.  Luckily, we've found an apartment so I have time to post a recipe I've been meaning to post for a while now.  Jen loves these lettuce wraps and has been asking me to post them.  Today is the day!

For some of you, Sriracha sauce, hoisin sauce and rice vinegar may not be kitchen staples, but trust me they make a lot of Asian food taste more delicious.  If you decide to buy them, I recommend getting them at an Asian market.  They tend to be much cheaper there than at your every day grocery store.  And keep in mind they last a long time and you don't need much in your recipes, so it's a great investment.  Plus, once you try this peanut sauce, you'll know you need these ingredients on hand.  This peanut sauce is that good.  And don't try to make it without the Sriracha.  Believe me, I've tried it.  It was highly disappointing.


Lettuce Wraps
Serves: 6 people

2 lbs. ground turkey
1/2 tsp. salt
5 cloves garlic, minced
2 tbs. fresh ginger, minced
3 green onions, sliced
1 - 8 oz. can water chestnuts, coarsely chopped
3/4 c. cabbage, minced
1/4 c. soy sauce
2 tsp. rice vinegar
2 tsp. hoisin sauce
1 tsp. Sriracha sauce
3 tbs. cilantro, chopped
1 head green leaf, Boston Bibb or iceberg lettuce, washed and separated into individual leaves
(You can use any of these.  Boston Bibb is my favorite since it's soft enough to fold without breaking.  It is also the most expensive.  Iceberg is fairly traditional, but it breaks too easily for my taste.  Green leaf was a happy, cheaper compromise for me.)

Brown turkey with salt.  Add garlic, ginger and cabbage when the meat has stopped producing so much liquid.  Cook until the meat is no longer pink.

Add green onions and water chestnuts.  Mix all together and cook for a minute.

Add soy sauce, rice vinegar, hoisin sauce and Sriracha sauce.  Stir until combined and cook for about 3 minutes for it all to incorporate.

Mix cilantro in when ready to serve.

Eat on a lettuce leaf with peanut sauce drizzled on.


Peanut Sauce

1 tsp. olive oil
2 cloves garlic, minced
1 tbs. fresh ginger, minced
6 tbs. water (or chicken broth)
5 tbs. hoisin sauce
1/2 c. peanut butter (I do creamy, but crunchy could be good too.)
1 tbs. Sriracha sauce
1 tbs. brown sugar
1 tbs. lime juice

Saute garlic and ginger in olive oil until fragrant.

Add in water, hoisin sauce, peanut butter, Sriracha, brown sugar and lime juice.  Cook until everything is combined and smooth.

Add more water if the sauce is too thick.  It should be smooth and thick, but still able to drizzle.

Peanut sauce adapted from kolpona.com 


Tuesday, May 12, 2015

Homemade Chunky Applesauce

A few weeks ago I ended up with a large bag of apples.  I made apple cake, apple pancakes, and ate several apples.  I still had about eight apples left, but they weren't tasting quite as fresh.  What to do?  Make applesauce!  Homemade applesauce is so good!  I love it when it is hot and drizzling it with a little cream and sprinkling a little sugar on top.  It is also good just on its own.


Ingredients:

8 apples (I used fuji, honey crisp, and ambrosia apples)
1 teaspoon lemon juice
1/3 cup water

1. Peel, core, and dice the apples.  Place in a pot with a lid and lemon juice and water.  Cook over medium low heat stirring every few minutes.  As they cook they will start to get soft and break down.  I generally try to help this process along by smashing some of the apple chunks against the side of the pot with the spoon.

2. Serve, enjoy, or freeze!

Variations:  If you would like cinnamon, feel free to add it.  Not a fan of chunky applesauce?  Run it through the blender.  If it is too thick, add more water.

Sunday, May 3, 2015

Tortellini with Red and White Sauce

I'm not an avid Trader Joe's shopper.  But every now and then I go there and pick up some of their divine yogurt, produce and tortellini.  They have the best price for tortellini that I've seen.  It's a fun treat for us that we only have every once in a while.  I found this easy recipe on Simply So Good and adjusted it so there was less cream, no wine and a few more seasonings.  It is quick, easy and delicious.  It's a great throw together meal that tastes like it was way more work than it actually is.  I love meals like that.  


Tortellini with Red and White Sauce

White Sauce
1 cup chicken broth
2 cups half and half
Salt and pepper to taste

Red Sauce
1tbs. olive oil
1 can Italian style diced tomatoes
2 cloves garlic, minced
1 tsp. oregano
1 tsp. basil
1 tbs. butter
Salt and pepper to taste

1 package tortellini


In a small saucepan, heat chicken broth until it is simmering.  Let it simmer until it is reduced to about 1/4 cup.  Mix in cream and add salt and pepper to taste.  Keep warm on the stove, stirring once in a while to keep a skin from forming on top.

In another saucepan heat olive oil and then add the canned tomatoes.  Once that whole mixture is warm add the garlic, oregano, basil and butter.  Add salt and pepper to taste.  Let simmer for about 10 minutes, or until everything is ready.  I've let mine simmer for up to 45 minutes with no problems.  I actually like mine better the longer it simmers, but the goal with this meal, is generally a fast meal!

Cook the tortellini according to the package.

Add drained tortellini to cream sauce and simmer on medium-low heat for about 5 minutes.

Serve in a bowl with the red sauce spooned on top.  It is also divine with fresh basil, parmesan cheese and sautéed zucchini.

Note: The cream sauce is rather thin.  If you'd like it thicker, whisk a few teaspoons of cornstarch into the half and half and then gradually whisk that mixture into the chicken broth.  

Adapted from Simply So Good

Thursday, April 30, 2015

Asian Chicken with Peanut Noodles and Cucumber Sambal

The first time I ate this, Valerie made it for me at the end of a really long day.  I loved pretty much everything about it!  The fresh vegetables made this a refreshing meal and it is full of so many flavors and colors.  The chicken is tender and flavorful, the vegetables are slightly pickled, yet still crisp, and the noodles are lightly coated in a delicious peanut sauce.  It is slightly sweet, sour, a tiny bit spicy, and nutty all at the same time.  This week I kept thinking about how good this was, but I was worried that it only tasted so good, because I was so hungry the first time I ate it.  I made it again, and loved it just as much the second time around.


Cucumber Sambal
1 large cucumber, diced
1/2 cup sliced green onions
1/2 of a large red bell pepper, diced
3 tablespoons rice vinegar
2 teaspoons sugar
1/4 teaspoon red pepper flakes
1/2 teaspoon salt

Chicken and Peanut Noodles
3 tablespoons brown sugar, divided
2 tablespoons soy sauce, divided
1 teaspoon olive oil
1/2 teaspoon salt
3 chicken breasts
2/3 package of whole wheat spaghetti noodles
1/3 cup chicken broth
1/4 cup creamy peanut butter
2 tablespoons rice vinegar
2 tablespoons fresh lime juice
1 tablespoon fresh ginger, minced
1 garlic clove, minced
2 teaspoons sriracha sauce
1 teaspoon sesame oil
cilantro, for garnishing

For the cucumber sambal, toss everything together and chill until ready to serve.

For the chicken, combine 1 tablespoon brown sugar, 1 tablespoon soy sauce, olive oil, and salt.  Slice the chicken and toss to coat the chicken with the sauce and let it sit for a few minutes minutes.

While the chicken is resting, turn a pot of water on to boil.

In a small sauce pan, combine broth, peanut butter, 2 tablespoons brown sugar, vinegar, lime juice, 1 tablespoon soy sauce, ginger, sriracha, and sesame oil.  Heat until it reaches a gentle simmer, stirring often.  Let it simmer for 3-4 minutes.

Cook the chicken in a frying pan on medium high heat, a couple minutes per side.  Depending on how thin you sliced your chicken, it should cook fairly quickly.

While chicken is cooking, add noodles to boiling water and cook according to package directions.

When the noodles are finished, drain and toss with peanut sauce.

Top the noodles with chicken, cucumber sambal, and serve.  Enjoy!

Adapted from Mel's Kitchen Cafe.


While writing this post, I remembered how good this was, and  had to take a break to go eat some of the leftovers.  Asian food is a totally appropriate morning snack, right?  Good, I'm glad you are with me on that.

Crockpot Refried Beans

Refried beans are the best!  They are so easy to make from scratch- I don't even soak the beans, just dump everything in the crockpot, turn it on, and then mash everything all up.  The onion disappears and you are left with some pretty incredible beans.  I left all the seeds in the jalapeno and no one complained about the heat, but if you are really worried about it you can take the seeds out and you will get the flavor, but not the heat from the beans.  Now as a small disclaimer, these aren't actually refried, but they are fat free and tasty as can be.  They pair with about any Mexican or tex-mex type meal and also freeze great!

1 pound dry pinto beans
1 onion, roughly chopped
2 cloves garlic, minced
1 jalapeno, chopped
2 teaspoons salt
1 teaspoon cumin
1/2 teaspoon chili powder (optional- sometimes I add this, sometimes I don't)
1/4 teaspoon pepper
2 cups chicken broth
4 cups water

1. Rinse beans in a colander and pick out any shriveled or questionable looking beans.

2. Add all ingredients, except the salt to crockpot.  Cook on high for 4-5 hours.

3. Remove about 1/3 of the liquid, but save it for later.  Add the salt and mash the beans with a potato masher right in the crockpot.  I still like some texture to my beans, but if you want them totally smooth, I bet an immersion blender would also work great here.  If they are too thick, add some of the reserved water/ broth until they reach desired consistency.  Keep in mind that they do thicken quite a bit as they sit, so make them runnier than you like to eat them.  Enjoy!

Friday, April 24, 2015

Lemon White Chocolate Scones

I've never been a fan of white chocolate.  There are very few appropriate uses for white chocolate in my book.  Let me tell you, this is one of those appropriate uses. The combination of it with the buttery, lemony dough was divine.  I almost left the white chocolate out and I am so glad I didn't!  If you've had a rocky relationship with white chocolate like me, give it another go in the form of this scone.  I made these for a baby shower I was throwing (without trying the recipe before, of course).  They were a hit! I'll definitely make these again. So light and tender and delicious!


Lemon White Chocolate Scones

1 3/4 cups flour
2 teaspoons baking powder
1/2 teaspoon salt
1 tablespoon sugar
1 1/2 teaspoon lemon zest
8 tablespoons cold butter, cut into 1/3-inch cubes
3/4 cup white chocolate chips
3/4 cup whole milk 
1 teaspoon lemon juice 

Preheat oven to 400 degrees.  Mix the flour, baking powder, salt, lemon zest and sugar in a mixer or a medium sized bowl. Using the paddle attachment, add the butter and mix until coated with flour.  The butter chunks should still be large, not less than half their original size.  Add the white chocolate chips.  Stir gently.  With the mixer set on a slow speed add the milk and lemon juice and mix until just absorbed.  Stop mixing when the dough begins to pull away from the sides of the bowl.  Make sure not to over mix. It is the key to these tender.  The butter needs to be in decently large chunks or they will turn out tough.

Shape into a ball gently. Try not to handle the dough too much.  The warmth of your hands will melt the butter and you want the chunks still. Roll the dough into a 7-inch disk.  Cut into quarters and then again into eighths.  Set the scones on a cookie sheet.  Bake until golden brown, about 15-20 minutes.


Glaze

1 1/2 cups powdered sugar
1 tablespoons milk
2 tablespoons fresh lemon juice
1/2 teaspoon lemon zest

In a medium sized mixing bowl add the powdered sugar and lemon zest.  Stir in lemon juice and milk one tablespoon at a time.  Continue to add more lemon juice until desired consistency. 

Adapted slightly from Simply So Good to make them more lemony 


Monday, April 20, 2015

Salsa Verde

I spent three months living down in Mexico about a year and a half ago.  I loved it and I count it as one of the best experiences of my life.  We frequented this taqueria close by and the tacos were incredible!  They had this green salsa that was good enough to drink, but I didn't have access to it back here in the states.  My friend Nadia told me how she makes hers, so I have adapted it a bit to the point I think it is pretty close!


10 tomatillos (I used medium to large ones, if you have small ones, throw in a few more)
1 jalapeno, diced (I leave the seeds in)
1/4 of an onion
2 cloves garlic, minced
1/4 of a bunch of cilantro, ends trimmed and roughly chopped
1 teaspoon salt
1/2 teaspoon cumin
juice of 1/2 lime
1/2 large avocado

1. Remove the husks from the tomatillos and wash them well to remove any dirt.  Quarter them and put the tomatillos and jalapeno in a pot with about an inch or two of water.  Cover with a lid and cook until tomatillos are soft, stirring every couple minutes and adding more water if needed.

2. Pulse the onion, garlic, and cilantro in the blender until it is minced.

3. Pour the contents of the pot, including the water into a blender.  Add salt, cumin, lime juice, and avocado.  Pulse a few times and add additional salt, if desired to taste. Sometimes at this point I decide I want it hotter, so I will dice up another 1/2-1 jalapeno and blend it again.

Just for old times sake- here we are at El Habenero eating incredible tacos!


And this was how they made those wonderful tacos al pastor, with the pineapple on top!  My mouth is watering.


Thursday, April 9, 2015

Black Bean Burgers

Growing up, I didn't like meat very much.  I didn't care for the taste or texture much.  I've recently learned to appreciate well prepared meat and cook with it most days a week.  And while I've never had a desire to be a full on vegetarian, I like having meatless options.  Especially ones as flavorful, satisfying and healthy as this one.  This is not a gross vegetarian burger.  Even my meat loving Dad loves this recipe.  It's cheap and delicious.  Oh and they freeze beautifully.  You can pop them in the microwave or on the stove and heat them up in a jiffy.  But usually we eat them all before they make it to the freezer.


This call for cooked brown rice, so plan accordingly.

Black Bean Burgers

1 medium onion, chopped
3 cloves of garlic, minced
1 jalapeno, minced
1 1/2 tsp. cumin
1 - 15 oz. black beans, rinsed and drained
1 1/4 cups brown rice, cooked
3 tsp. lime juice
1/4 tsp. salt
1/2 tsp. pepper
1/2 - 1 cup bread crumbs
1/4 cup cilantro, chopped

Cilantro Lime Mayo:
1/2 cup mayo (or sour cream or plain yogurt if you prefer)
3 tsp. lime juice
1/2 tsp. cumin
1/4 cup cilantro, finely chopped
1/4 tsp. pepper

For the Burgers:
Sauté the onion until soft.  Add the jalapeño and cumin and cook for 2 minutes.  Add garlic and cook for one more minute or until fragrant.

This part you can either do by hand, which is what I usually do, or with a food processor if you have one.  I've tried using a blender before and wouldn't recommend it since it tends to get stuck in the small base and underneath the blades.  But who knows, your blender might be better.  I'm going to give instructions to do it by hand.

In a medium sized bowl throw the onion mixture, black beans, rice, lime juice, salt and pepper in all together.  Squish all together with your hands.  You want chunks of beans still, but squished enough that it will hold together.  Starting with 1/4 cup bread crumbs mix in breadcrumbs until it is firm enough to form patties.  Stir in cilantro.  

Form into patties.  Depending on the size you want, it can be anywhere from 4-8 patties.  I usually make them on the smaller size.  Put them on a pan or plate, cover with plastic wrap and refrigerate for at least 30 minutes.  This and the breadcrumbs really do make a difference.  They won't hold up nearly as well when cooking without this step.

Heat 1 Tsp. of olive oil on medium heat.  When sizzling, add burgers and cook 4 minutes per side and a nice crust forms.

For the Cilantro Lime Mayo:
Mix all ingredients together.  Refrigerate until ready to use.

Serve burgers on whole wheat buns with avocado, tomato, greens and cilantro lime mayo.  


Adapted from http://cuisinenie.blogspot.com/2010/07/black-bean-burger-recipe-with-cilantro.html 

Spicy Corn Chowder

Our younger sister made this corn chowder and declared it blog worthy!  She loves all things creamy and this hit the spot.  She was kind enough to make it for our parents and they put their stamp of approval on the recipe.  This recipe is a keeper!


Ingredients
·         2 tablespoons extra virgin olive oil
·         2 stalks of celery, finely chopped
·         1 medium onion, finely chopped
·         1 jalapeno, finely chopped, (remove some or all of the seeds and membrane if you don't like the heat)
·         4-8 strips of bacon cooked and crumbled
·         3 cloves garlic, minced
·         2 (14-oz.) cans chicken broth
·         3 tablespoons all purpose flour
·         1 1/2 cups frozen corn kernels
·         8 oz. softened cream cheese
·         1 cup milk
·         1/2 teaspoon salt
·         1/4 teaspoon black pepper
·         1 cup shredded cheddar cheese

Directions

1.       Place olive oil in a large pot over medium heat. Saute celery, onion, and jalapeno until tender, about 5 minutes. Stir in the garlic and bacon; cook for another 3 minutes. Whisk the broth and flour together in a liquid measuring cup or bowl until no lumps remain, then add to the pot. Gently stir in the corn and chicken. Bring to a low boil and reduce heat to a gentle simmer.
2.       Whisk together the cream cheese and milk in a large bowl until smooth (I recommend softening the cream cheese in the microwave to make it easier to whisk)
3.       Whisk the cream cheese/milk mixture into the soup along with the salt, pepper, and cheddar cheese. Simmer on low until ready to serve


Side Note: I have not tried this, but I imagine that if you substitute bacon grease for the olive oil grease it would be delicious, because um, bacon!

Wednesday, April 8, 2015

A Few Kitchen Tips (Round Two!)

I love spending time in the kitchen and here are a few helpful kitchen tips that I use on a regular basis.  These tips have saved me money by keeping vegetables fresh longer, not tossing out spoiled food, or making a special trip to the store for buttermilk.

Storing Asparagus
Have you ever notice that the asparagus in the store is standing up in water? That is actually the correct way to store it when you bring it home. Just like flowers, asparagus stored in water stays fresh much longer. Place about an inch of water in a jar or bowl, stand the asparagus in it, and cover it with the produce bag you brought it home in. This is the same idea as storing cilantro.


Buttermilk Substitution
I often make recipes that call for buttermilk, but rarely keep buttermilk on hand. If you're like me, you can make your own easily from regular milk and a few simple ingredients. Pour 1 1/2 teaspoons of lemon juice, white vinegar, or apple cider vinegar in a measuring cup. Fill to the one cup line with milk. Stir and let it sit for two minutes. Use it as a one-for-one buttermilk substitution.

The Egg Test
Eggs are often good well past the expiration date. You can test them to see if they are still good by gently dropping the egg into a glass of water. If it sinks it is still good; if it floats, toss it.


Onions
A cut onion can smell up a fridge if it is stored in plastic; however, aluminum foil traps odors. Wrap a cut onion in tin foil and it will not only keep it from stinking up the rest of the fridge, but it will stay good for a week or two.


Happy cooking!

Roasted Asparagus

I love spring and one of my favorite spring veggies is asparagus.  I did not enjoy eating asparagus as a child.  I remember being served boiled asparagus that was both mushy and stringy all at the same time.  I tried it again as an adult and realize that when it is prepared well, I actually love asparagus.  There are so many ways to prepare it that are so much tastier than boiling.  Roasting brings out the sweetness and the texture is awesome.  The ingredients and process are so simple, you will be amazed by how tasty this is!  Now pick up some asparagus next time you are at the store.  It is the cheapest and freshest at this time of the year.


Take a bunch of asparagus and wash and break the ends off.  Asparagus has a natural breaking point where the tough, woody bottom naturally breaks.  Snap off the ends and toss with about two teaspoons of olive oil.  Lightly sprinkle with coarse sea salt and freshly cracked black pepper.Spread out on a cookie sheet.  Bake for about 10-12 minutes in a 400 degree oven.  Enjoy!

Friday, April 3, 2015

Basil Coconut Curry Chicken

This is a recipe I have made several times and it is full of flavor!  It falls into the category of Americanized Asian food,   I simplified the process from the original recipe and it still turned out great.  Whatever you do, don't omit the jalapeno.  If you take the seeds out, it will only add flavor, not heat.

3 chicken breasts
2 teaspoons curry powder
1 teaspoon salt
1/2 teaspoon pepper
1/4 teaspoon chili powder
1 tablespoon olive oil
1 onion, chopped
4 cloves garlic, minced
1 jalapeno finely chopped (removed the seeds if you can't take the heat)
1 tablespoon dried basil
1/2 teaspoon dried ginger
1 can coconut milk
1 tablespoon cornstarch
1 tablespoon basil


1. In a small bowl stir together curry, salt, pepper, and chili powder.  Cut chicken into chunks and toss with seasoning blend.

2. Heat oil in a frying pan and add chicken, onion, garlic, jalapeno, basil, and ginger.  Cook until onion is translucent and chicken is cooked through.

3. Whisk coconut milk and cornstarch together, until there are no lumps.  Add to skillet, reduce heat and cook for 2-3 minutes until it is slightly thickened.

4. Serve with hot rice and veggies.

Adapted from Mel's Kitchen Cafe.

Wednesday, April 1, 2015

German Pancakes

One of my favorite things about this breakfast is that it can bakes while I get ready in the morning.  It is a classic breakfast recipe that I goes by many different names, but I grew up with these called German pancakes.  It magically puffs up in the oven making for a really fun breakfast.  You can top these with lemon juice and powdered sugar, fruit or jam, but my favorite is a drizzle of pure maple syrup.


6 eggs
1 cup milk
1 cup flour
1/2 teaspoon salt
3 tablespoons butter

1. Preheat oven to 400 degrees.  Place butter in a 9x13 pan and place in the oven.  Keep an eye on it and remove the pan when the the butter is melted.  If you wait too long, you will have burnt butter.  Gross.

2. Mix eggs, milk, flour, and salt together with an electric mixer until no lumps remain and mixture is frothy.

3. Pour the batter on top of the melted butter and return the hot pan to the oven.  Bake for 18 minutes.  It will have brown edges and be all puffed up.

Thursday, March 26, 2015

Lime Chicken

On Monday I started a new job that keeps me much busier!  I'm still here and will post, but Jen may be taking the lead for a while while I make lots of costumes.

I don't repeat recipes very often.  I love trying new things too much.  But this one has quickly become a favorite that I repeat at least once a month (which is a lot for me).  This recipe stems from my mother-in-law, who is a fantastic cook.  My husband loves this dish and soon after we got married he requested this recipe from his mother so I could make it.  I too have fell in love with it!  So simple, easy and delicious!


Lime Chicken

4 chicken breasts, boned and skinless
1/2 tsp. salt
1/2 tsp. pepper
2 T. olive oil
2 limes juiced and zested
1/2 c. butter

Pound the chicken until it is tender and the same width in all places.  (I don't have a meat tenderizer, so I improvise and use the handle of the large knife I use to cut the chicken.  I know, fancy.)  Cut into bite sized pieces.

Heat oil in medium sized skillet until sizzling hot (on my stove I turn it to medium high).  Once the pan is hot, slide the chicken in the pan and sprinkle with salt and pepper.  Sauté for 3-4 minutes on each side or until golden brown on all sides.  Check to see if the middle is done.  By this point mine is usually done, but if it is not done, turn heat down to low and cover and cook until the middle is white.

Once chicken is done, remove from pan and keep warm.  A bowl covered in tin foil should work.

Add lime juice to skillet now on medium low.  Cook until just boiling.  Add butter and cook until sauce turns opaque.  Add lime zest and spoon over chicken.

Enjoy!

Note: If you don't thaw your chicken before cooking, I highly recommend doing so.  I have recently become a convert to thawing chicken.  It produces much tender chicken.  It does take a little planning, but is so worth it.


Wednesday, March 25, 2015

The Best Whole Grain Banana Muffins

The other night after dinner was cleaned up I decided that I really needed muffins.  I had some brown bananas on the counter, homemade applesauce from Sunday, a bit of yogurt that needed to be used up, and freshly ground flour, so I went in search of a recipe.  These were the perfect solution.  I really love the other banana muffins on this blog, but I made these a few nights ago and fell in love.  These ones are a little heartier yet still moist and have chocolate!  The original recipe doesn't have any butter in it, but what is life without butter?  I'm pretty sure butter is my favorite food group, so be proud of me for only adding a touch of butter.


2 over ripe bananas, mashed
1/4 cup lightly packed brown sugar
1/2 cup plain greek yogurt
1 egg
1/2 cup unsweetened applesauce
1/2 teaspoon vanilla
1 1/2 cups whole wheat flour (I strongly recommend white wheat, not to be confused with white flour, explained more in this post)
1 teaspoon baking powder
1/2 teaspoon baking soda
1/4 teaspoon salt
1/3 cup mini chocolate chips
1 tablespoon butter, melted

1. Preheat oven to 375 degrees.  Lightly grease a 12 cup muffin tim.

2. Mash/ mix together bananas, brown sugar, yogurt, egg, applesauce, and vanilla.

3. In a smaller bowl, whisk together dry ingredients, including chocolate chips.  If you are using store bought flour, be careful to measure the flour with a light hand.  Freshly ground wheat is much lighter than store bought wheat flour.

4. Lightly fold dry ingredients into banana mixture.  When there are still dry streaks, add melted butter and stir until just combined.  There should still be a few lumps.

5. Spoon the batter into muffin cups.  Bake for 18 minutes or until a toothpick inserted into the middle comes out clean.

6. Remove the muffins from tin, and allow to cool.  Enjoy!

Adapted from Mel's Kitchen Cafe.

Tuesday, March 24, 2015

Butternut Squash, Spinach, and Penne Pasta

I love me a good one pot meal, and this one is probably my favorite.  When butternut squash goes on sale in the fall, this is one of the first things I make.  The butternut breaks down just a bit and combines with the broth and starches from the pasta to create a silky sauce.  It isn't a super saucy dish, but it also isn't dry.  Pair this with a salad, some fresh fruit, and maybe crusty bread and you have a great meal!

1 onion, minced
2 cloves garlic, minced
1 pound Italian sausage
1/2 teaspoon salt
1/4 teaspoon pepper
6 cups chicken broth
12-16 oz penne pasta (I always use whole wheat)
1 butternut squash, peeled and diced
3 cups baby spinach, roughly torn or chopped
1 teaspoon dry sage
1 cup shredded mozzarella cheese
Parmesan cheese for serving

1. In a large pot, add sausage, onion, garlic, salt, and pepper.  Cook over medium heat, breaking up the meat into small piece, and cook until sausage is cooked through, 5-7 minutes.  Scrape the mixture onto a plate and return pot to the stove.

2. Add the chicken broth and pasta and bring to a boil.  Reduce heat to a simmer and cook for about 8 minutes, stirring occasionally.  Stir in butternut squash and simmer until squash and pasta are almost tender.  If it starts to get dry add more broth or water.

3. Add spinach, sage, cheese, and sausage mixture and cook for another minute or two, until spinach is wilted and cheese is melted.

4. Serve in shallow dishes and garnish with fresh Parmesan.

Adapted from Mel's Kitchen Cafe.

Monday, March 23, 2015

Flat Bread

This bread is comfort food at its finest.  I can start this and have it out of the oven in 15 minutes, which is pretty great if you ask me.  Now just because it is fast, doesn't mean this is some mediocre recipe.  It is so good!  I am not one to sacrifice taste for time, and this bread is fantastic and who doesn't love hot bread strait from the oven?  Baking it at 500 degrees really does some pretty magical things to both the taste and time.

2 1/4 teaspoons yeast
1 cup warm water
1/2 teaspoon salt
1 teaspoon sugar
2 tablespoons olive oil
2-3 cups flour

1. Preheat oven to 500 degrees.

2. Combine all ingredients in a bowl.  Start with 2 cups of flour and knead ingredients together.  I usually start out with a spoon and end up using my hands.  Add more flour until it the dough isn't too sticky.  You should be able to handle the dough without it sticking to your hands too much.

3. Spray a cookie sheet with cooking spray and roll out the dough directly on the cookie sheet.  Bake for 6-8 minutes, until slightly brown on top.

4. Remove from oven and rub with a little butter, sprinkle on a little garlic salt, and cut into squares.

Very slightly adapted from 71toes.com.

Thursday, March 19, 2015

Lentil Tostadas

I found this recipe on a blog that no longer exists, The Lovely Cupboard.  Actually now that I think of it, perhaps my mom found it.  Either way, we made it for dinner together one night and loved it!  Lentils are cheap, healthy, filling and delicious.  This could make for a great college student meal because of all those factors (hint to my little brother).  If you think lentils are weird, this is a great starting point.  The lentils are infused with so much flavor you won't even think about the fact that you're eating lentils.  Try it.  You may like it!


Lentil Tostadas

2 cups water or chicken broth (I use broth)
1/2 of a large onion, chopped
3 cloves of garlic, minced
1/2 Tbs. olive oil
1/2 cup cilantro
1 cup dried lentils
1 Tbs. cumin
1 tsp. chili powder
1/2 tsp. cayenne pepper
2-4 Tbs. lime juice (I like 4, but some may not like lime as much as I do)
3/4 tsp. salt

Bring water or chicken stock to a boil.
In the olive oil saute the onion until it starts to soften then add garlic. Cook until the onion is translucent and you can smell the garlic. Mix in the cilantro.
Once water has boiled, add lentils, cumin, chili powder, cayenne pepper and onion mixture to the pot. Allow to boil for 2 minutes, then reduce heat to low. Simmer, covered, for 40 minutes. Stir occasionally.
Remove lentils from heat. Drain any excess liquid from the pot. Add the lime juice and salt. (Do not add these before cooking or they will cause the lentils to harden.)

Mash about 1/4 of the lentils against the side of the pot and stir with the whole lentils. This makes it spread easier on the tostada shells.
Spread on tostada shells or warmed corn tortillas. Top with avocado, chopped tomato, corn and lettuce.

Wednesday, March 18, 2015

Hamburger Buns

Who gets excited about hamburger buns?  No one right, well its because they have never  had mine before.  These are perfect.  They are sturdy enough to hold your burger, but still have that melt-in-your-mouth feature we all love about homemade bread.  These are about 1000 times tastier, 100 times healthier, and 10 times cheaper than their store bought counter parts.  They only rise once, making them come together pretty quick.  Whip a batch of these black bean burgers and you have a quick, tasty, fantastic meal.


1 cup milk
1/2 cup water
1/4 cup butter
3 cups whole wheat flour*
1- 1 1/2 cups white flour**
2 1/2 teaspoons yeast
2 tablespoons sugar
1 1/2 teaspoon salt
1 egg, slightly beaten

1. Warm milk, water, and butter on the stove or in the microwave until it is the temperature of a warm bath, not hot or it will kill your yeast.  The butter will probably only be partially melted.  Stir mixture until completely melted.

2. I did the rest of this in my kitchen aid, but you can also do it by hand in a large bowl.  Add milk mixture to the bowl of mixer.  Add dry ingredients starting with only 1 cup of the white flour.  Mix until ingredients are well combined.

3.  Add the egg and mix for another minute or two.  This will be a sticky dough, which makes for lighter buns.  If the dough is still extremely sticky, gradually add some or all of the remaining 1/2 cup of flour.

4. Lightly flour the counter and dump the dough out.  Rub a little oil or butter on your hands.  Divide the dough into half, then half again.  At this point you should have four pieces of dough about the same size.  Take each or those pieces and divide them into two or three pieces, depending on if you want smaller or larger buns.  I wanted smaller buns, so I made a total of 12 buns.  Form into flat disks.  I shaped them like I do my rolls, then smashed them a little flatter between my hands.  They will puff up in the oven.

5. Set them on a greased cookie sheet and cover with a clean dish towel.  Let them rise for 30-40 minutes.  Mine didn't look like they changed much in size during that time, but did most of their puffing up in the oven.

6. Bake at 400 for 12-14 minutes.

*As I discussed more at the bottom of this post, I almost exclusively use freshly ground white wheat.  White wheat gives baked products a much lighter texture and flavor.

**The amount of flour you use will vary based on altitude, temperature, and humidity.  You will know when to stop adding flour based off sight, touch, and practice.

Adapted from Pennies and Pancakes.