Pages

Showing posts with label Breads. Show all posts

Wednesday, December 23, 2015

The Best White Bread

I almost always make my own bread.  I have a wheat grinder and typically make whole wheat bread.  Last week I was visiting Valerie out in California and when I arrived, she had a fresh loaf of this bread on her counter.  It was heavenly.  When I got back from California, I decided to make breads for work gifts.  After church on Sunday and made 18 loaves of different kinds of breads!  It was pretty fun, but also rather exhausting.  This one was one of the breads in the mix and it was a winner.  I won't be abandoning my whole wheat bread recipe anytime soon, but when I want a treat, this hits the spot.


2/3 cup white sugar
2 cups warm water
5 teaspoons yeast
6 cups unbleached all purpose flour
2 tablespoons vital wheat gluten
2 teaspoons salt
1/2 cup oil

In a stand mixer, add sugar and warm water.  sprinkle yeast on top and let it sit 5 minutes until it gets foamy.  Add flour, salt, and oil.  Turn on mixer and knead for 7 minutes.

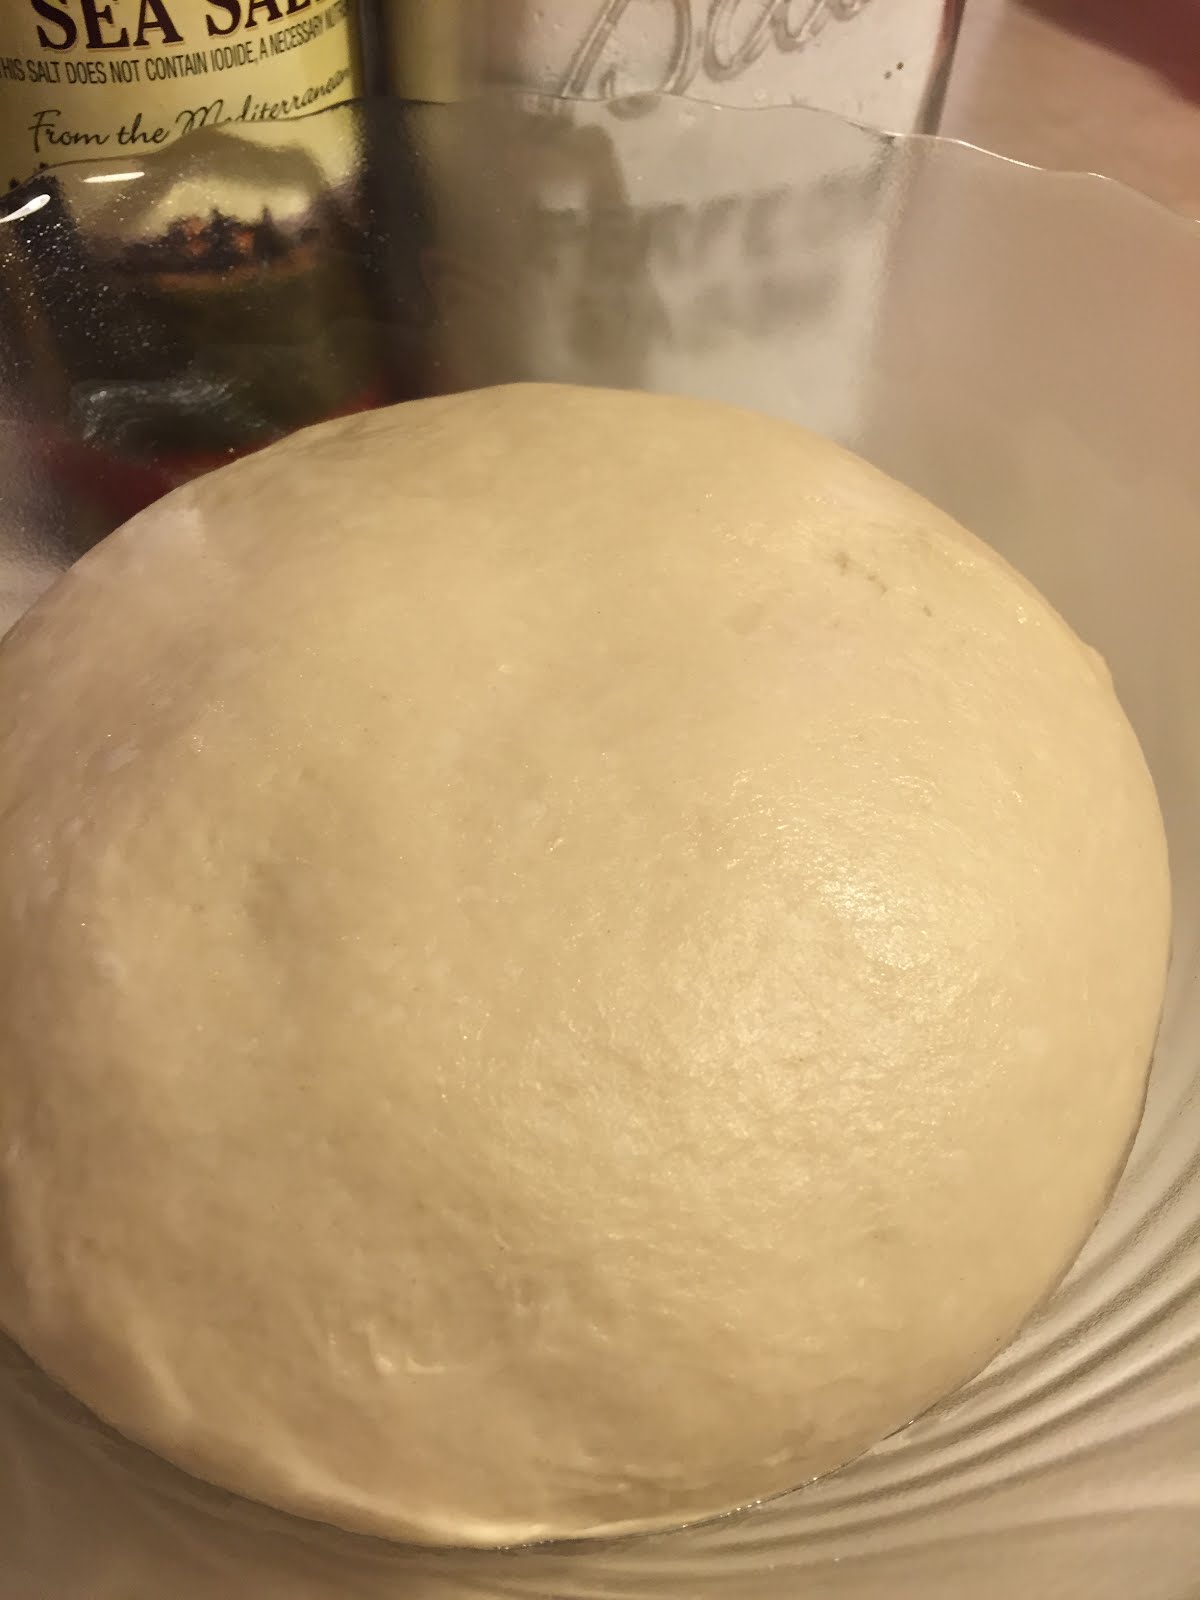
Place in a large, clean, greased bowl to rise and cover lightly with greased plastic wrap or a dish towel.  Let it rise until it has doubled in size.  If you poke the dough and it doesn't spring back, you will know it is ready.  Punch the dough down and knead it a couple of times.

With buttered hands, shape into two loaves and place in greased bread pans.  Let it rise again until it has risen to the top of the loaf pan.

Bake at 350 for 30 minutes.  Remove promptly from pans and let it cool on a baking rack or clean dish towel.

Enjoy!

Tips:

Flour:  Flour should never be an exact measurement when making yeast breads.  The look at touch of the dough will tell you how much flour to add more than a measuring cup.  The dough should be very soft.  Add just enough flour that you can still handle the bread, but no more.  If you flour your finger and tap the dough without it sticking, it will be just right.  Another indicator is to watch for when the dough starts pulling away from the sides of the bowl.

Freezing: This dough freezes great.  Unless I am going to give a loaf of bread away, two loaves is way too much.  You can freeze it after the first rise, when you shape the loafs. Place one shaped loaf in a gallon sized freezer bag. When you are ready to use the frozen loaf, place it in a greased loaf pan, cover with lightly greased plastic wrap, and let it thaw overnight in the fridge. In the morning place in on the counter and let finish rising for a few hours.  Bake as normal.

Saturday, November 7, 2015

The Best Biscuits Ever

I'm alive! I haven't posted in months and months. Morning sickness got the better of me for a while and then I was just plain busy! But I hope I can post on here regularly again. I've been cooking up a storm lately and have lots of recipes I want to share. The trick is remembering to photograph them. I always forget to take pictures. I'm hoping having a baby will help me remember that I actually want to document life (and maybe that will apply to the food I make too?).

Anyway, today I want to share with you my favorite biscuit recipe ever. I've heard a lot of people say they don't like biscuits. And I have experienced way too many dry, tough biscuits that are not worth eating. But these are a different story. They are flaky and light and delicious. Give these babies a chance and you might just find yourself liking biscuits.


The Best Biscuits
Makes 12 biscuits

Note: They will only turn out light and flaky if you don't overwork the dough. Be careful not to handle it too much. You want little pieces of butter still in the dough even after it has been kneaded. This is what produces the flaky, light texture.

Ingredients:
2 cups all-purpose flour (I've done as much as 3/4 wheat and they are still delicious!)
1 tablespoon sugar
3 teaspoons baking powder
1 teaspoon salt
1/2 cup butter
3/4 cup milk

Directions:

1. Heat the oven to 450°F. In a medium bowl, stir the flour, sugar, baking powder and salt until mixed. Cut in the butter using a pastry blender or fork, until mixture looks like fine crumbs. Stir in the milk until mixture forms a soft dough and leaves the side of the bowl (dough will be soft and sticky).2. Lightly sprinkle  our over a cutting board or countertop. Place dough on floured surface; gently roll in the  our to coat. To knead dough, fold dough toward you. With the heels of your hands, lightly push dough away from you with a short rocking motion. Move dough a quarter turn and repeat 10 times. Dough will feel springy and smooth.3. On the floured surface,  flatten dough evenly, using hands or a rolling pin, until dough is 1/2 inch thick.4. Before cutting each biscuit, dip a 2 1/2-inch round cutter into  our to lightly coat it so it will cut cleanly through the dough without sticking. To cut, push the cutter straight down through the dough without twisting or turning. Cut the biscuits as close together as possible. On an ungreased cookie sheet, place biscuits about 1 inch apart for biscuits with crusty sides, or place with sides touching for biscuits with soft sides.5. Bake 10 to 12 minutes or until golden brown. Immediately remove from cookie sheet. Serve warm. 

Wednesday, June 10, 2015

Portuguese Sweet Bread

Okay guys, it has been a while.  Can I just say that I was moving to another state and be forgiven for my absence?  Thanks for being patient while I packed up and unpacked all my belongings.  I haven't cooked nearly as much in the past month since we were searching for an apartment, packing, moving and unpacking.  But I am back on my game!  I have gone to the store a million times and feel like I am finally stocked up on my staples.  I may have cringed and pulled my hand back when I saw the prices, but at last I have realized I have left cheap Utah prices behind.  Sigh.  The food may not be cheap in California, but it is a beautiful place to live!  And farmer's markets year round?  Yeah, I'll take that.

This recipe doesn't take anything from the farmer's market, but is absolutely divine.  This lightly sweetened bread is my husband's favorite.  In fact, it was his birthday "cake."  He'd much rather have this than actual cake.  I'm alright with that.  Though not the healthiest bread to down, it certainly is one of the most delicious.  Light and fluffy and delicate lemon flavor combine to make the most addicting bread.  It never lasts long in our house!


Portuguese Sweet Bread

1/3 c. milk
2 tbs. instant mashed potatoes
1/3 c. sugar
1/4 c. butter, cut into chunks
1 tbs. yeast
1/4 c. warm water
2 large eggs
1/2 tsp. salt
zest of one lemon
1/2 tsp. vanilla
2 1/4 - 2 3/4 c. all-purpose flour
2 tbs. melted butter

Heat milk until boiling. Remove from heat and immediately stir in instant mashed potatoes, sugar and butter. Let cool until just warm.

In a stand mixer or bowl, sprinkle yeast over water and let stand for 5 minutes. With the dough hook, mix the beaten eggs, salt, lemon zest, vanilla, potato mixture and flour. Start with 2 cups of flour and mix until combined. Keep adding flour slowly with the mixer going until you have a soft dough. It will no longer be sticky. Be careful not to add too much flour or the dough will become too stiff.

Cover dough with a damp kitchen towel and let rise in a warm place until doubled, about 1 1/2 hours.  If you poke an indentation in the dough and it doesn't spring back, it has risen enough. If you are in a hurry, my sister-in-law taught me a great trick. Warm your oven up just slightly and then turn the oven off. Leave the dough in the oven to rise and it will rise quicker. Just make sure it is mildly warm in the oven. If it is too hot, let it cool down before putting the dough in. We don't want to cook the bread yet!

Knead dough breifly to release air bubbles. Let dough rest 5-10 minutes.

On a lightly oiled surface, roll dough with your fingers into a 30" rope. Coil rope, twisting slightly as you go, into an oiled 9" pie pan, starting in the center and moving out.

If desired, brush with melted butter. Cover loosely with plastic wrap and let rise in a warm place until puffy, about 40 minutes.

Uncover and bake in a pre-heated over at 350 degrees for 25 minutes or until deep golden brown.


Slightly adapted from my mother-in-law.

Friday, April 24, 2015

Lemon White Chocolate Scones

I've never been a fan of white chocolate.  There are very few appropriate uses for white chocolate in my book.  Let me tell you, this is one of those appropriate uses. The combination of it with the buttery, lemony dough was divine.  I almost left the white chocolate out and I am so glad I didn't!  If you've had a rocky relationship with white chocolate like me, give it another go in the form of this scone.  I made these for a baby shower I was throwing (without trying the recipe before, of course).  They were a hit! I'll definitely make these again. So light and tender and delicious!


Lemon White Chocolate Scones

1 3/4 cups flour
2 teaspoons baking powder
1/2 teaspoon salt
1 tablespoon sugar
1 1/2 teaspoon lemon zest
8 tablespoons cold butter, cut into 1/3-inch cubes
3/4 cup white chocolate chips
3/4 cup whole milk 
1 teaspoon lemon juice 

Preheat oven to 400 degrees.  Mix the flour, baking powder, salt, lemon zest and sugar in a mixer or a medium sized bowl. Using the paddle attachment, add the butter and mix until coated with flour.  The butter chunks should still be large, not less than half their original size.  Add the white chocolate chips.  Stir gently.  With the mixer set on a slow speed add the milk and lemon juice and mix until just absorbed.  Stop mixing when the dough begins to pull away from the sides of the bowl.  Make sure not to over mix. It is the key to these tender.  The butter needs to be in decently large chunks or they will turn out tough.

Shape into a ball gently. Try not to handle the dough too much.  The warmth of your hands will melt the butter and you want the chunks still. Roll the dough into a 7-inch disk.  Cut into quarters and then again into eighths.  Set the scones on a cookie sheet.  Bake until golden brown, about 15-20 minutes.


Glaze

1 1/2 cups powdered sugar
1 tablespoons milk
2 tablespoons fresh lemon juice
1/2 teaspoon lemon zest

In a medium sized mixing bowl add the powdered sugar and lemon zest.  Stir in lemon juice and milk one tablespoon at a time.  Continue to add more lemon juice until desired consistency. 

Adapted slightly from Simply So Good to make them more lemony 


Wednesday, March 25, 2015

The Best Whole Grain Banana Muffins

The other night after dinner was cleaned up I decided that I really needed muffins.  I had some brown bananas on the counter, homemade applesauce from Sunday, a bit of yogurt that needed to be used up, and freshly ground flour, so I went in search of a recipe.  These were the perfect solution.  I really love the other banana muffins on this blog, but I made these a few nights ago and fell in love.  These ones are a little heartier yet still moist and have chocolate!  The original recipe doesn't have any butter in it, but what is life without butter?  I'm pretty sure butter is my favorite food group, so be proud of me for only adding a touch of butter.


2 over ripe bananas, mashed
1/4 cup lightly packed brown sugar
1/2 cup plain greek yogurt
1 egg
1/2 cup unsweetened applesauce
1/2 teaspoon vanilla
1 1/2 cups whole wheat flour (I strongly recommend white wheat, not to be confused with white flour, explained more in this post)
1 teaspoon baking powder
1/2 teaspoon baking soda
1/4 teaspoon salt
1/3 cup mini chocolate chips
1 tablespoon butter, melted

1. Preheat oven to 375 degrees.  Lightly grease a 12 cup muffin tim.

2. Mash/ mix together bananas, brown sugar, yogurt, egg, applesauce, and vanilla.

3. In a smaller bowl, whisk together dry ingredients, including chocolate chips.  If you are using store bought flour, be careful to measure the flour with a light hand.  Freshly ground wheat is much lighter than store bought wheat flour.

4. Lightly fold dry ingredients into banana mixture.  When there are still dry streaks, add melted butter and stir until just combined.  There should still be a few lumps.

5. Spoon the batter into muffin cups.  Bake for 18 minutes or until a toothpick inserted into the middle comes out clean.

6. Remove the muffins from tin, and allow to cool.  Enjoy!

Adapted from Mel's Kitchen Cafe.

Monday, March 23, 2015

Flat Bread

This bread is comfort food at its finest.  I can start this and have it out of the oven in 15 minutes, which is pretty great if you ask me.  Now just because it is fast, doesn't mean this is some mediocre recipe.  It is so good!  I am not one to sacrifice taste for time, and this bread is fantastic and who doesn't love hot bread strait from the oven?  Baking it at 500 degrees really does some pretty magical things to both the taste and time.

2 1/4 teaspoons yeast
1 cup warm water
1/2 teaspoon salt
1 teaspoon sugar
2 tablespoons olive oil
2-3 cups flour

1. Preheat oven to 500 degrees.

2. Combine all ingredients in a bowl.  Start with 2 cups of flour and knead ingredients together.  I usually start out with a spoon and end up using my hands.  Add more flour until it the dough isn't too sticky.  You should be able to handle the dough without it sticking to your hands too much.

3. Spray a cookie sheet with cooking spray and roll out the dough directly on the cookie sheet.  Bake for 6-8 minutes, until slightly brown on top.

4. Remove from oven and rub with a little butter, sprinkle on a little garlic salt, and cut into squares.

Very slightly adapted from 71toes.com.

Wednesday, March 18, 2015

Hamburger Buns

Who gets excited about hamburger buns?  No one right, well its because they have never  had mine before.  These are perfect.  They are sturdy enough to hold your burger, but still have that melt-in-your-mouth feature we all love about homemade bread.  These are about 1000 times tastier, 100 times healthier, and 10 times cheaper than their store bought counter parts.  They only rise once, making them come together pretty quick.  Whip a batch of these black bean burgers and you have a quick, tasty, fantastic meal.


1 cup milk
1/2 cup water
1/4 cup butter
3 cups whole wheat flour*
1- 1 1/2 cups white flour**
2 1/2 teaspoons yeast
2 tablespoons sugar
1 1/2 teaspoon salt
1 egg, slightly beaten

1. Warm milk, water, and butter on the stove or in the microwave until it is the temperature of a warm bath, not hot or it will kill your yeast.  The butter will probably only be partially melted.  Stir mixture until completely melted.

2. I did the rest of this in my kitchen aid, but you can also do it by hand in a large bowl.  Add milk mixture to the bowl of mixer.  Add dry ingredients starting with only 1 cup of the white flour.  Mix until ingredients are well combined.

3.  Add the egg and mix for another minute or two.  This will be a sticky dough, which makes for lighter buns.  If the dough is still extremely sticky, gradually add some or all of the remaining 1/2 cup of flour.

4. Lightly flour the counter and dump the dough out.  Rub a little oil or butter on your hands.  Divide the dough into half, then half again.  At this point you should have four pieces of dough about the same size.  Take each or those pieces and divide them into two or three pieces, depending on if you want smaller or larger buns.  I wanted smaller buns, so I made a total of 12 buns.  Form into flat disks.  I shaped them like I do my rolls, then smashed them a little flatter between my hands.  They will puff up in the oven.

5. Set them on a greased cookie sheet and cover with a clean dish towel.  Let them rise for 30-40 minutes.  Mine didn't look like they changed much in size during that time, but did most of their puffing up in the oven.

6. Bake at 400 for 12-14 minutes.

*As I discussed more at the bottom of this post, I almost exclusively use freshly ground white wheat.  White wheat gives baked products a much lighter texture and flavor.

**The amount of flour you use will vary based on altitude, temperature, and humidity.  You will know when to stop adding flour based off sight, touch, and practice.

Adapted from Pennies and Pancakes.

Monday, March 9, 2015

Easy Focaccia Bread

It's no secret that I love bread and homemade bread is my absolute favorite.  But as a busy working lady I don't have much time to make bread since it has to rise for so long - that is, unless we want bread at 10:30 pm.

Enter my new favorite way to make bread.  The ridiculously easy, no-knead crusty bread recipe from Simply So Good.  You mix together flour, salt, yeast and water in about two minutes and then let it rise overnight.  I let it rise all night and all day and then cook it with dinner.  It is so easy.  You don't even need to take out your Kitchen Aid.  Also, it seems impossible to mess this up.  If you are afraid of yeast, this is a good place to start.

Another awesome thing is that this dough is incredibly versatile.  I've made it into artisan bread, pizza dough and now focaccia.  Each way has been incredible.  This focaccia is amazing because it doesn't have to rise again so it's a quicker bread option.  Also, who doesn't love bread topped with cheese and spices?


Easy Focaccia Bread
Makes 1, 8 x 8-inch focaccia.

3 cups all-purpose flour
1 3/4 teaspoons kosher salt
1/2 teaspoon yeast
1 1/2 cups lukewarm water

1/4 cup olive oil

For the topping:
Seasoning Salt
Rosemary
Basil
Oregano
Garlic Powder
Shaved Parmesan Cheese
(Anything your heart desires)


In a large mixing bowl combine flour, yeast and salt.  Stir in water.  Mix until all the ingredients are combined.  Do not over mix.  Cover with plastic wrap and let stand for 12 - 24 hours.  (I usually mix mine together right before I go to bed and let it sit until dinner time.  If it sits a little bit longer though it is nothing dire.)

When ready to bake, heat oven to 450 degrees.  Cover the bottom of an 8 x 8-inch square pan with olive oil. (I've had problems with it sticking in some pans, so now I always line the bottom with a square of parchment paper and then pour the olive oil on top.)

Scrape dough out of the bowl (it will be very sticky) directly into the prepared pan.  Press the dough lightly to spread out.  Don't overwork or squish it.  You want the air pockets.  Just gently press your fingertips all over it to spread it and dimple it.  I dip my fingers into the olive oil on the bottom so they don't stick.

The toppings is where you can get creative.  I placed Parmesan shavings on and then lightly sprinkled on seasoning salt, rosemary, basil, oregano and garlic powder.  You can do any combination you would like.

Cover tightly with aluminum foil and bake for 25 minutes.  Remove foil and bake for an additional 20 minutes or until golden.

It will be crispy when it first comes out of the oven. If you prefer a softer bottom, I recommend covering it with tinfoil again and letting it sit for a few hours. It tastes delicious either way!

Adapted from Simply So Good

Thursday, February 26, 2015

Healthy Banana Muffins

Have you ever eaten a muffin and thought it tasted like dessert?  Yeah, those muffins are tasty, but this is perfect when you want something tasty that doesn't taste like dessert.  This recipe contains no butter or oil and very little sugar.  Bananas are already super sweet, especially when they are brown, so there isn't really a need to add much sugar.  These are moist and are healthy enough to eat with breakfast.

1 cup flour*
1 tablespoon baking powder
1/2 teaspoon baking soda
1/4 teaspoon salt
3 very ripe mashed bananas
3 tablespoons sugar
1/3 cup plain or vanilla yogurt
1 egg
1 teaspoon vanilla

Mix wet ingredients together.  Add dry ingredients and stir util just barely combined.  If you over mix muffins or quick breads they will be tough, not the tender muffins that we all love.  Scoop into a greased muffin tin and bake at 350 for 15 minutes.  Makes 12 muffins.

*You can use white flour.  To make these muffins more nutritious I usually do half wheat flour.  I strongly recommend using white wheat in this recipe otherwise your muffins will be dense and heavy.  I have also used oat flour.  I often grind oat flour in a grain mill from oat groats, but you can also just put oatmeal in the blender and pulse until it looks like flour!  Either of these swaps will make for healthier muffins.

Wednesday, February 11, 2015

The Best Wheat Rolls

I have tried a lot of roll recipes in my time.  Some have been too dry.  Some recipes claim to be whole wheat, but are mostly white flour.  White rolls have their place, but if you are wanting something slightly less indulgent, but still light, fluffy, and melt-in-your-mouth-good, this is your recipe.  Don't be intimidated by yeast, yeast is our friend, not foe.  So without further ado, here you are.


2 Tablespoons dry yeast
1/3 cup warm water*
2 cups warm milk
9 cups whole wheat flour, divided**
1 cup melted butter
3/4 cup honey
4 eggs
2 teaspoons salt
Additional butter

Mix yeast, honey, and warm water together in a bowl.  Add 4 cups of the flour, milk, butter, eggs, and salt.  Make sure the milk and butter are just warm, but not hot.  If they are too hot they can kill the yeast.  How do you know if it is too hot?  Well, I shall tell you.  If you can comfortably stick your finger in, it is perfect!  Mix until dough is smooth.  Gradually add remaining flour until dough isn't too sticky.  You may not need to add the full amount.  Here is the trick with adding flour.  If you add too much, you will have dry, dense rolls.  No one likes that.  You want to error on the side of adding too little rather than too much flour.  You will know when you have added enough flour when the dough starts pulling away from the sides of the bowl.  Also, if you dip your finger in flour and tap the dough it shouldn't stick too much.

After  all the flour is added continue to knead for 3-5 minutes.  I generally do this in my kitchen aid, but you could do it in a bosch, or even by hand.

Spray a large bowl with cooking spray and plop the dough in.  Spray the top with cooking spray and cover with plastic wrap.  Let it rise until it has doubled in size.  You can eyeball it or if you poke the dough and the mark of your finger stays, you will know it is ready.

Divide the dough into six sections and pat or roll until it is a circle a little smaller than a dinner plate.  I spray the counter with cooking spray or spread a little olive oil on the counter to roll it out so I don't add more flour.  Then use a sharp knife or pizza cutter to divide each circle into 8 wedges like a pizza.  Roll them up like crescent rolls and place them on a greased baking sheet to rise again for about 20-30 minutes.  Once they are almost doubled in size bake at 375 for about 10-15 minutes or golden brown.  When they come out of the oven, brush them with some melted butter.

**Wheat flour comes in many varieties.  The most common are red and white wheat.  I prefer hard white wheat.  It has similar nutrition as red wheat, but a lighter texture and flavor than red wheat.  I have found I can often sub out white flour with white wheat flour in other recipes without a dramatic change.  Most of the wheat flour sold in the store is red wheat.  I know gold medal sells white wheat flour and I have seen it at Trader Joe's too or your can grind your own, which is what I normally do.  It is really cheap (if you have access to a grain mill) and much healthier.  You can use red or white wheat in this recipe, but I think you will be more pleased with the results if you use white wheat.  If you are looking for pictures and more information, this explains it in a little more detail.

Adapted from Heavenly Homemakers.